Introduction
The Web Player offers a useful option for clients who want a solution that requires almost no setup. Think of the Web Player as a way to get digital signage on your screens. Specifically, if a device, such as a tablet or PC, has a Chrome-based web browser, including Chrome, Chromium, and Edge, then the Web Player can turn it into a powered digital signage screen. Since no hardware or cables are involved, they must copy the registration number on the screen and paste it into the Portal.
Setting up a Web player
First, you must access the URL below from your Smart TV, PC, or browser to download the Chrome extension.
Chrome Extension and Web Player URL
We strongly recommend using the Chrome browser and installing the Chrome extension.
Registering a Web Player on your Account
- Open a new tab and follow the URL below. After that, you will see the screen below on your TV or browser.
- https://player.dsbackend.com/
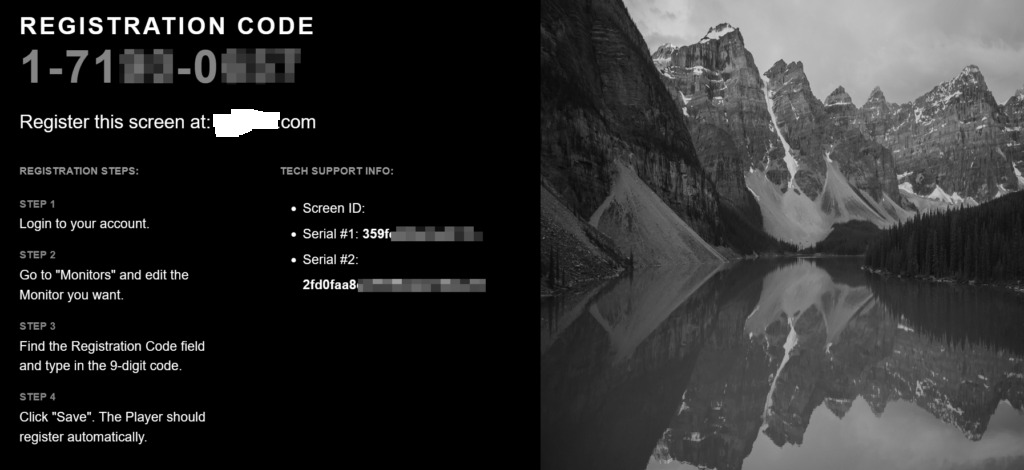
After you see the registration code on your browser/TV screen, register the player for your account.
After a minute or so, your player should register with your Account and start showing content on the screen.
- Log in to your Account
- Go to “Screens“.
- If you haven’t created a Screen entry on your account yet, click the “+Add Screen” button.
- A new window will pop up. Choose the Web Player option.
- In the “Registration Code” field, type in the 9-digit registration code you see on your browser/TV screen and click the “Save” button.