Table of Contents
Introduction
You are in the right spot if you need to create your player based on Windows using the software.
Remember, though, that this process requires some basic IT skills.
Setup
Windows Supported Devices — MUST READ
Before installing the application on your Windows PC, please check this compatibility table for more details and to see if your PC supports the software.
Step 1 – Get the registration code
1) Download the latest unbranded Windows software
2) When you download the exe, make sure you keep it in Chrome downloader
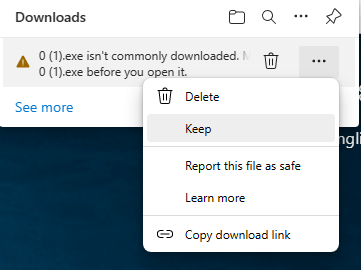
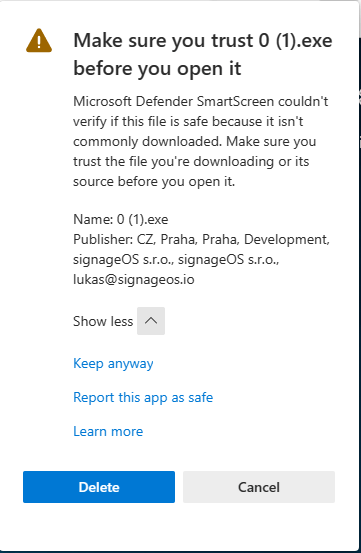
3) Once you click keep, go to show more -> Keep anyway
4) Downloads -> Run exe -> More options -> Run anyway
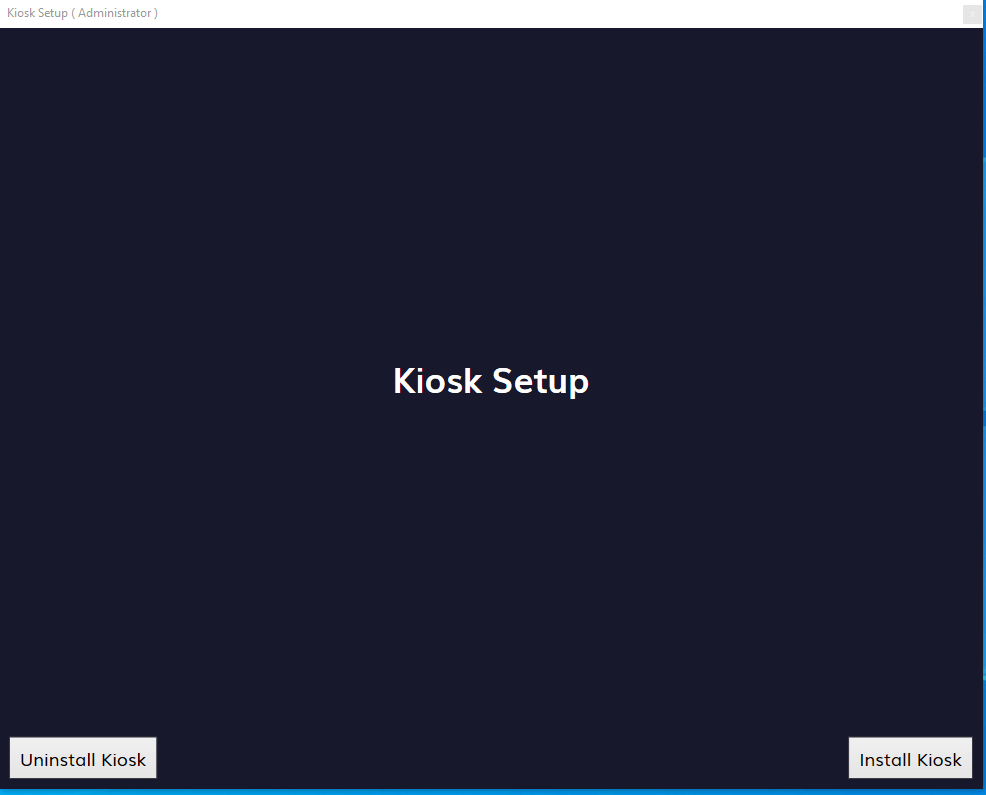
5) Kiosk Setup opens -> Install Kiosk
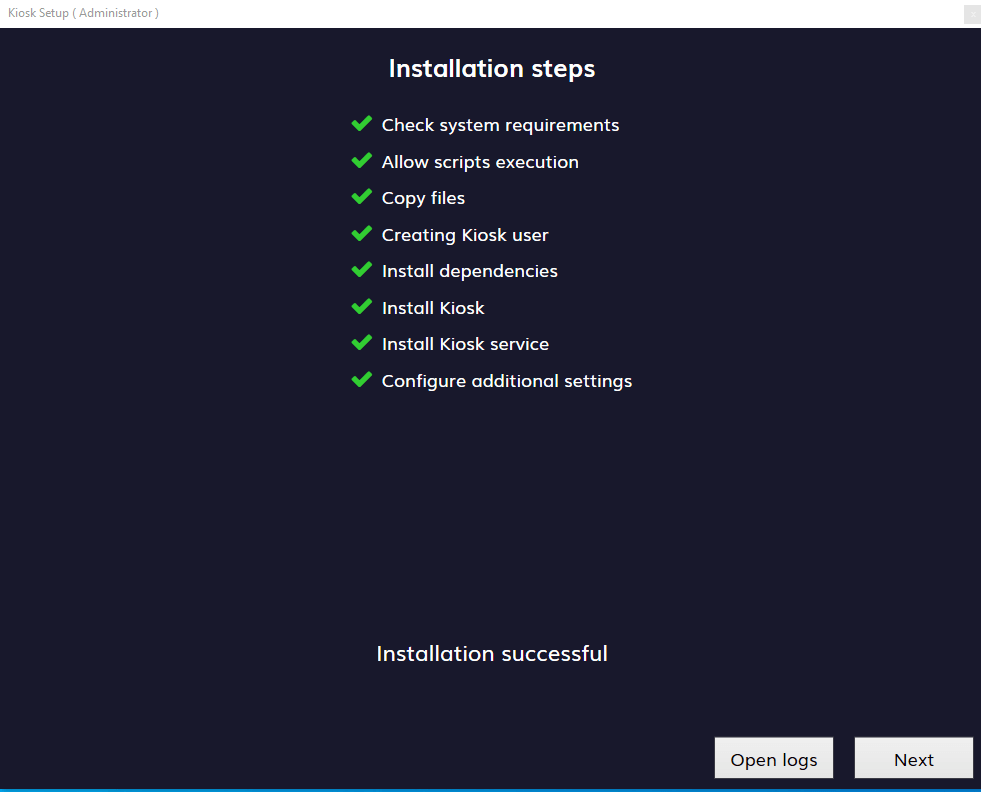
6) Set a desired password to move in and out of the Kiosk user -> Click Install, and wait for everything to finish.

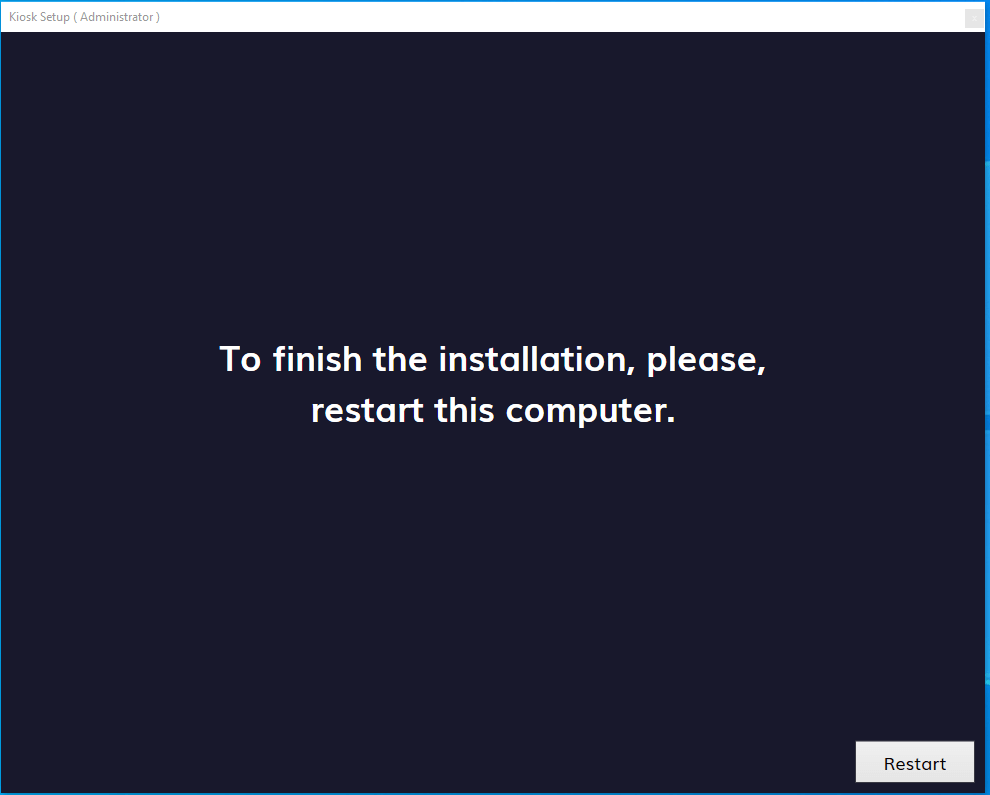
7) Once everything is done, click Next
8) Finally, click Restart
9) The device will always start in Kiosk User (to get out of it, use Ctrl+Alt+Delete).
10) A 9-digit code will be displayed on the screen when the device restarts.
Step 2 – Registering a Windows Player on your Account
After seeing the registration code on your screen, you must register the player to your Account.
- Log in to your Account and go to the “Screens” section.
- Create a new Screen entry by clicking the “+Add Screen” button.
- A new window will pop up. Choose the Windows Player option.
- In the “Registration Code” field, type in the 9-digit registration code you see on your TV screen and click the “Save” button.
- After a minute, your player should register with your Account, and the assigned content should start showing on the screen.
Limitations
- Turning the TV on and off remotely using CEC. For Windows devices, the screen will turn black instead of turning on or off.
- Running custom script code on Web pages.
- YouTube Live Streams.
- Apps with Script code.
- 4K is currently not supported.