Overview

Your teams stay informed when company news reaches them where they already are. The Speakap app turns your internal communications into Speakap digital signage, so frontline and deskless employees see announcements, news and events on the screens around them without opening an app or checking their email.
Use it on reception screens, break room displays, factory floor monitors, warehouse screens, and office corridors: anywhere your people gather but rarely sit at a desk.
What you can display from Speakap
You choose which post types reach your screens. The app supports:
- News: company announcements and articles your team publishes in Speakap.
- Updates: shorter posts and day-to-day messages from your teams.
- Events: the events your teams share across the organization.
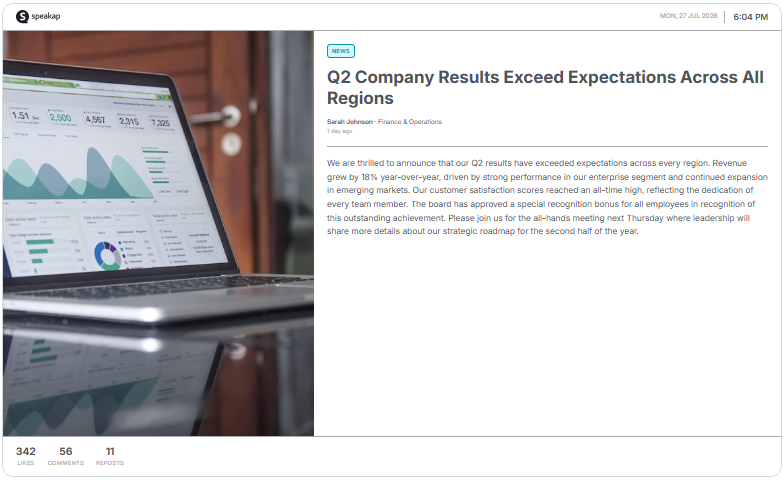
Each post keeps its author, timestamp, post type label and body text. Images and videos attached to a post play as part of the slideshow, and engagement counts appear in the footer so viewers see how the post is landing across the company.
Choosing a layout
Two layouts cover the two kinds of content most companies publish:
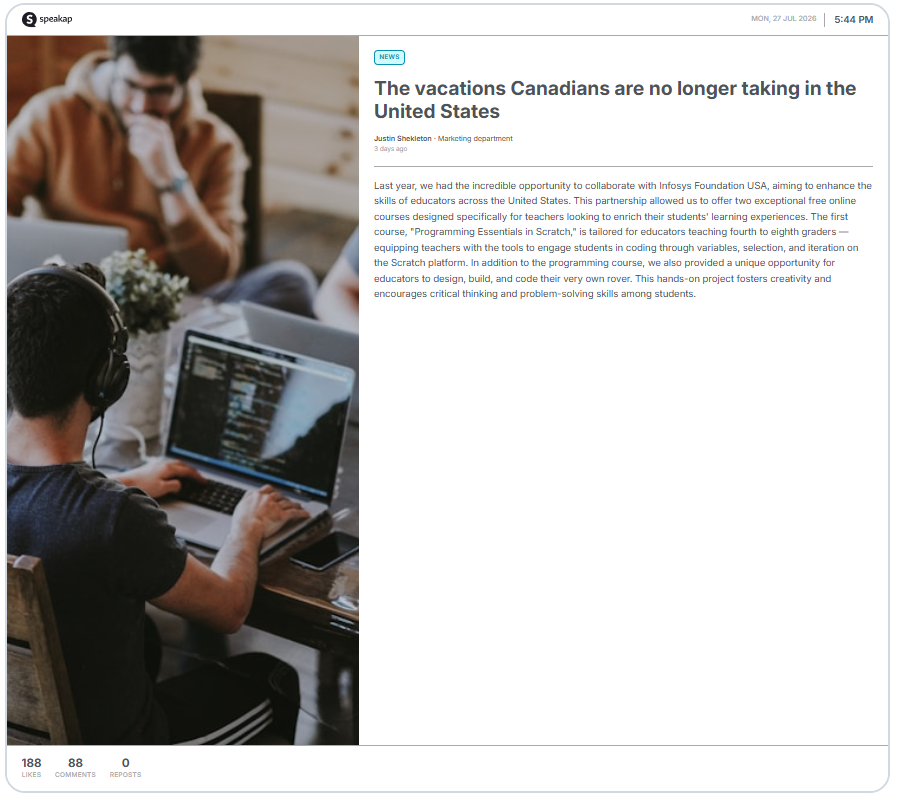
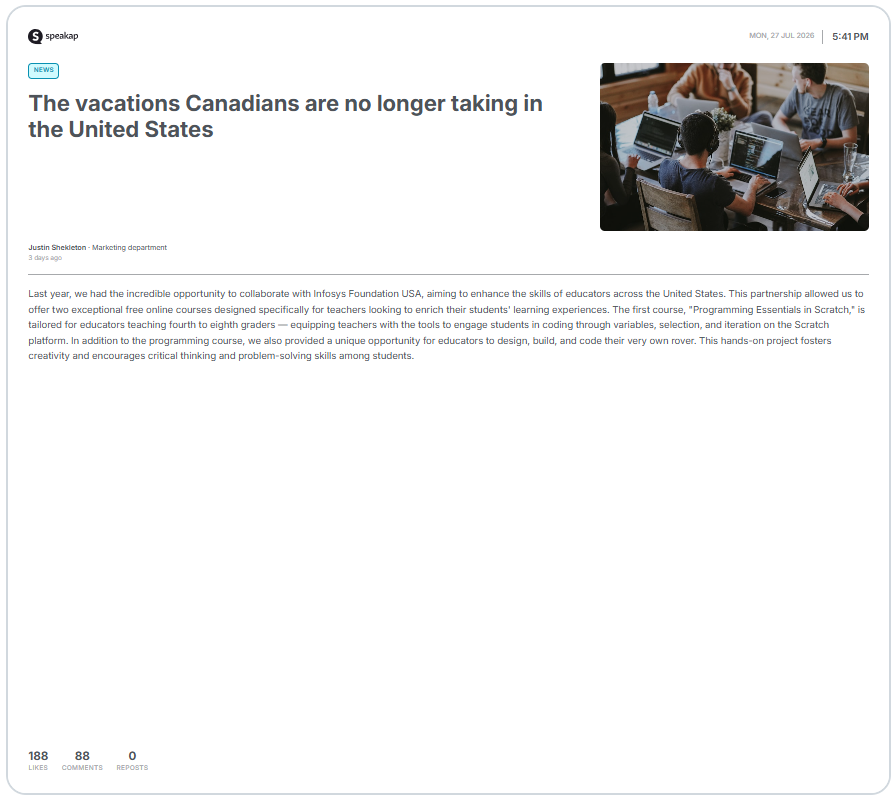
- Visual: puts the post image or video front and center, with the text alongside it. Pick this when your posts usually carry photos, and for screens people walk past.
- Editorial: gives the text more room and treats media as a supporting element. Pick this for text-heavy announcements, and for screens people stand in front of, such as break rooms.
How the Speakap app works
Once you save the app and assign it to a screen, everything runs on its own:
- The app connects to your Speakap network using the credentials you entered.
- It retrieves the post types you selected, up to the number of posts you set, and plays them as an automatic slideshow.
- It checks Speakap for new content at the refresh rate you set, and picks up new posts without anyone touching the screen.
- If the app appears in a playlist alongside other content, playback resumes from where it left off the next time its turn comes around, so viewers do not see the same first post over and over.
Before you begin
The app connects to Speakap using credentials you generate inside Speakap itself. Have these ready before you start:
- An active Speakap network for your organization.
- Access to Speakap’s Network Settings, where you add the custom application. If you cannot reach it, ask your Speakap administrator to run the steps below and send you the credentials.
- Your Speakap domain, in the form
yourname.speakap.com. - Published content in Speakap. The app can only show posts that already exist, so publish at least one News, Update or Event post before you test.
Generating your Speakap ID and Secret
The platform needs an ID and a Secret from Speakap to retrieve your posts. You create them once, by adding the platform as a custom application in your Speakap network.
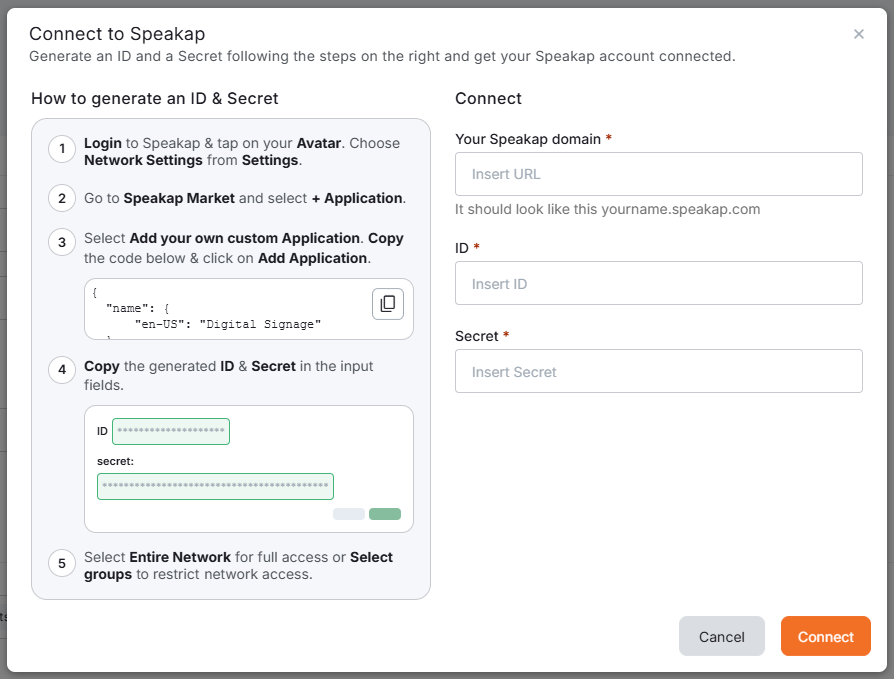
Start on the platform. Add the Speakap app from your App Gallery, then click Login with Speakap to open the Connect to Speakap window. That window holds the configuration code you need in step 3 below, and it lists these same steps, so keep it open in one browser tab and your Speakap network in another.
Then, in Speakap:
- Log in to Speakap and click your Avatar, then choose Network Settings from Settings.
- Go to Speakap Market and select + Application.
- Select Add your own custom Application. Switch to your platform’s tab, copy the configuration code from the Connect to Speakap window using the copy icon beside it, paste it into Speakap, then click Add Application.
- Speakap generates an ID and a Secret. Copy both.
- Choose how much of your network the platform can read. Select Entire Network for full access, or Select groups to limit the platform to specific groups.
Back in the platform, paste your Speakap domain, ID and Secret into the Connect to Speakap window and click Connect.
Treat your Secret like a password. Anyone who has it can read the Speakap content you granted access to. Store it somewhere safe, and share it only with the people who set up your screens. It does not expire, so you generate it once and reuse it.
The access scope you choose in the last step decides what the platform can ever see. Pick Select groups when public screens should never show sensitive internal discussions, because it limits access at the source rather than relying on the app’s settings.
Creating a Speakap app
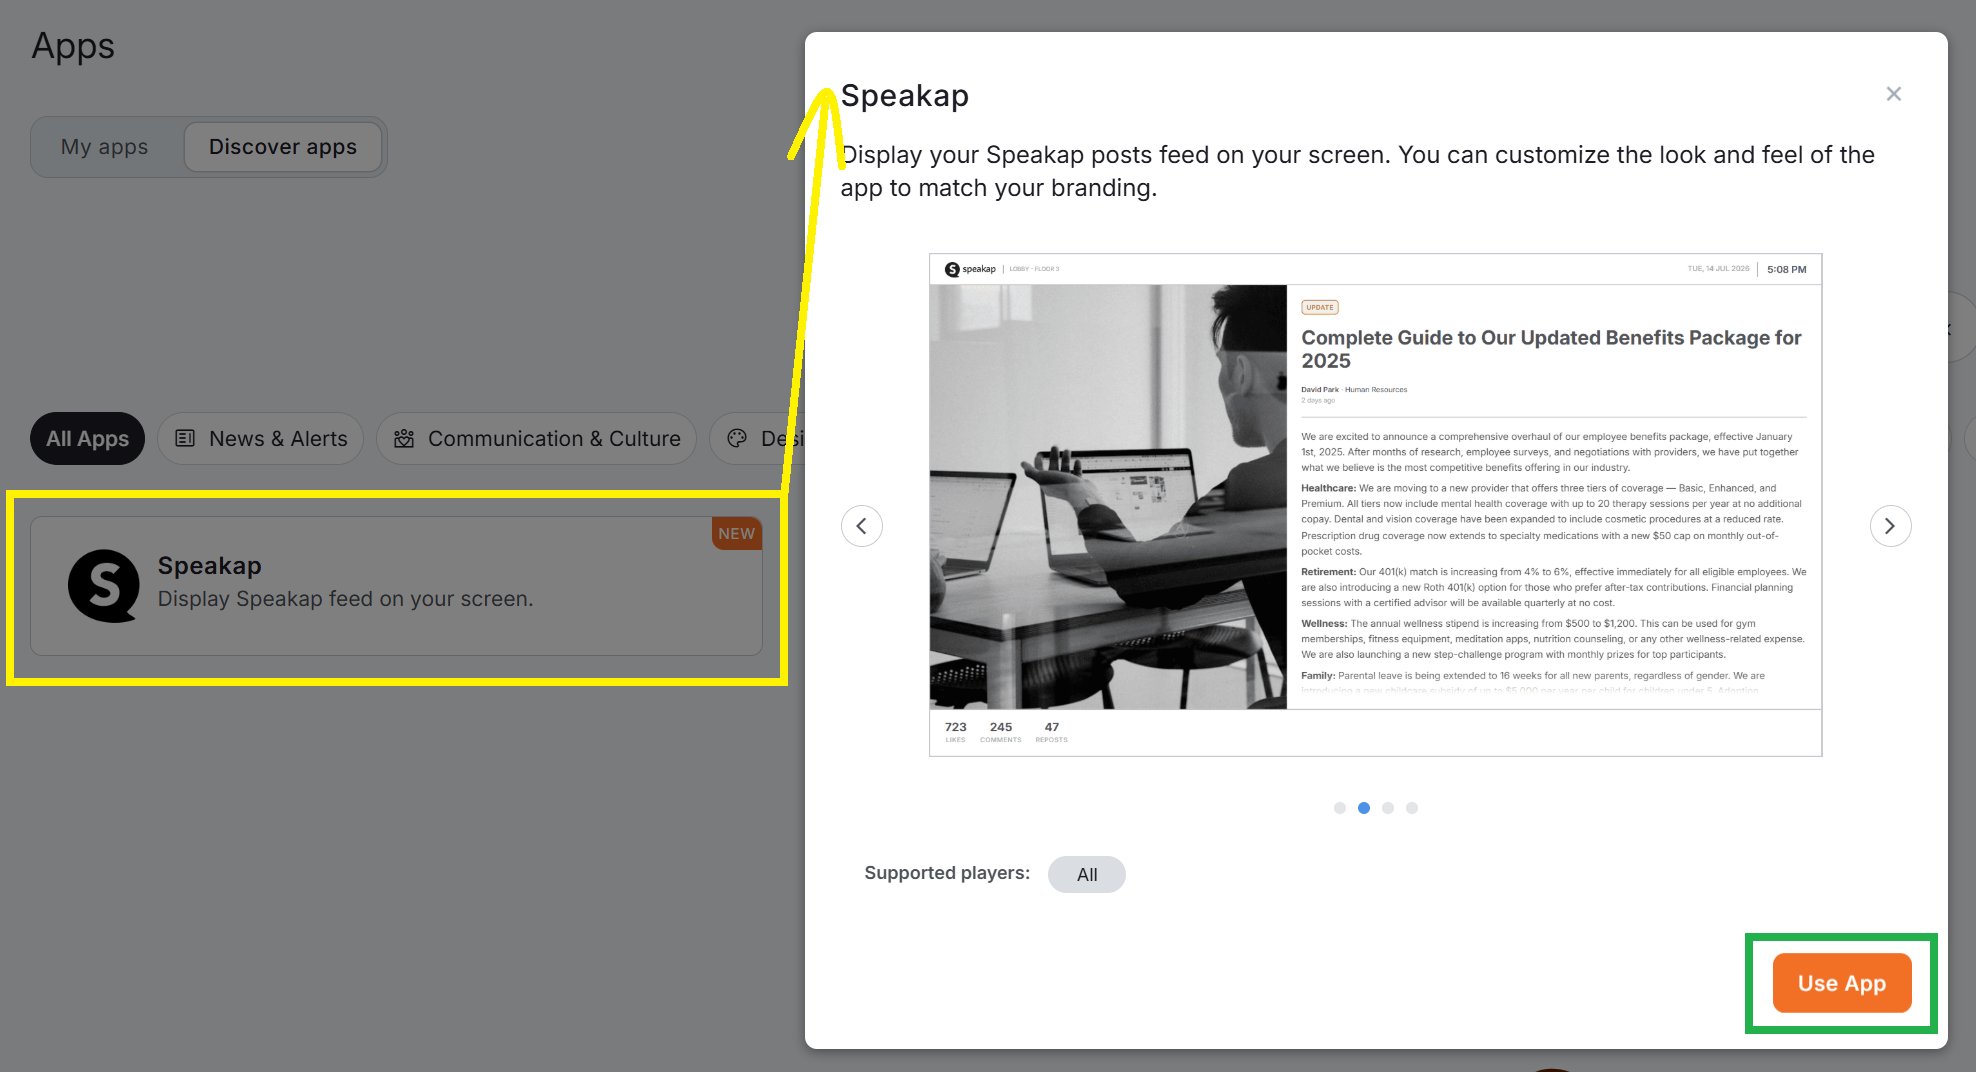
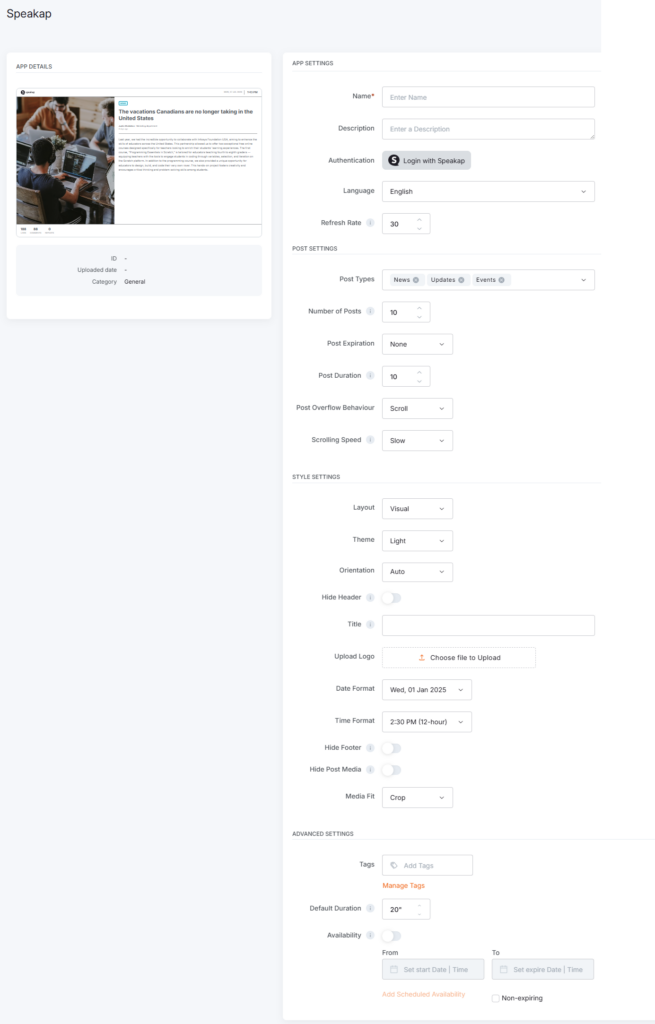
Click on the Speakap App within your App Gallery to add it, and fill in the app details as follows.
App Settings
- Name: Give your app a name. This is required, and it identifies the app in your platform account.
- Description: Optionally add a short note about what this app displays. Helpful once you run several Speakap apps for different screens.
- Authentication: click Login with Speakap to open the Connect to Speakap window, then enter your Speakap domain, ID and Secret and click Connect. See Generating your Speakap ID and Secret if you do not have these yet.
- Language: select the language for the app’s own interface text, such as labels and post type names.
- Refresh Rate: set how often the app checks Speakap for new posts, in minutes. Choose any value from 15 to 180 in steps of 5. The default is 30.
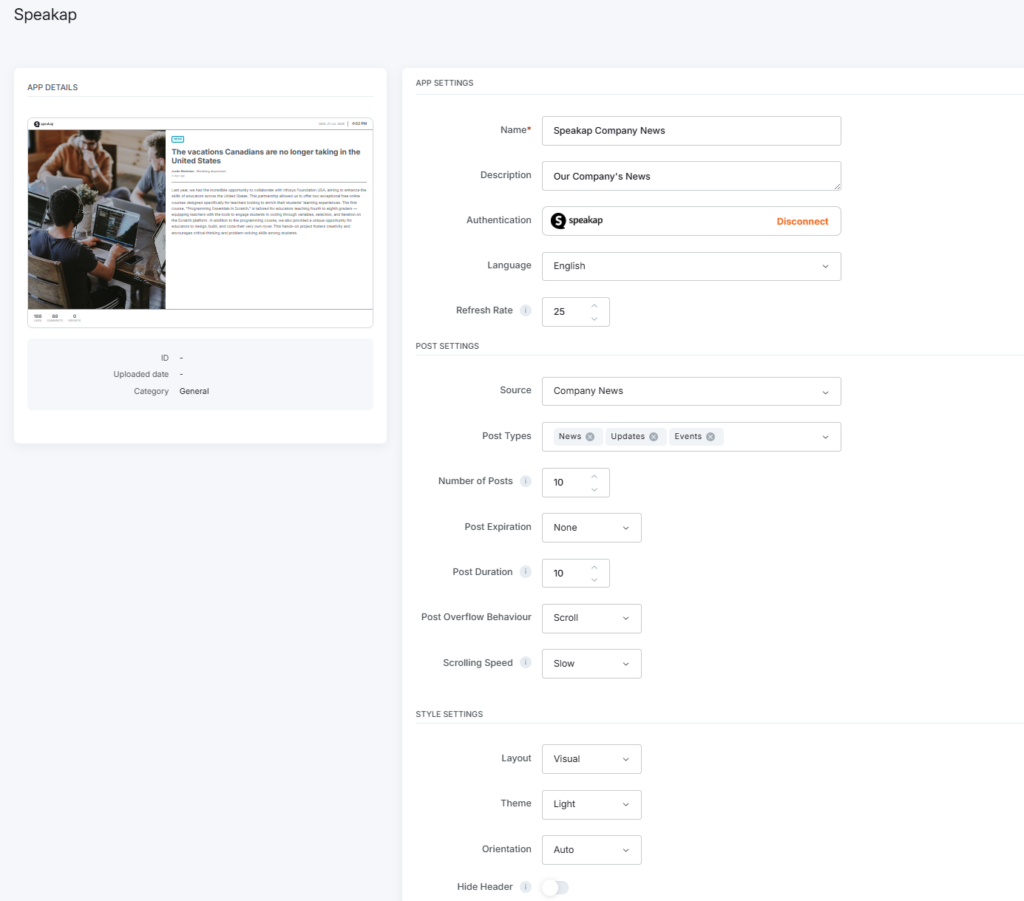
After you connect, one more field appears:
- Source: select where the app pulls posts from. This is required, so pick at least one source. You can select more than one, and the list shows what you granted the platform access to in Speakap. Click the x on a source to remove it. Source is where you decide whether a screen shows company-wide news or the updates for one site or department.
💡Good to know: the Language setting translates the platform’s own text only. Your posts appear exactly as your team wrote them in Speakap.
Post Settings
- Post Types: choose which of the three post types to display. All three are selected by default. Click the x on a type to remove it.
- Number of Posts: set how many of the most recent posts the app pulls in, from 1 to 100. The default is 10.
- Post Expiration: stop showing posts once they pass a certain age. Choose Last 24 hours, Last 7 days or Last 30 days, or select None to keep showing posts regardless of age.
- Post Duration: set how long each post stays on screen, in seconds. The default is 10.
- Post Overflow Behaviour: decide what happens when a post is longer than the space available. Scroll moves the text so viewers read the whole post, while Truncate cuts it off at the edge of the available area.
- Scrolling Speed: set how fast long posts scroll, to Slow, Medium or Fast. This applies only when Post Overflow Behaviour is set to Scroll.
- Tip: match Post Duration to how long people actually stand in front of the screen. Give a corridor screen a shorter duration and a break room screen a longer one, and pair longer durations with scrolling so viewers finish reading. Keep an eye on the total, too: Number of Posts multiplied by Post Duration is how long the app takes to cycle once, so 50 posts at 10 seconds means over eight minutes before the first post returns.
Style Settings
- Layout: choose Visual or Editorial.
- Theme: pick Light, Dark or Custom. Light suits bright rooms and reception areas, Dark suits dim spaces and screens that run overnight. Choose Custom to match your own brand, and three extra options appear: Font Family: select the font used for your posts from the available list.
- Text Color: set the color of the post text. Pick a color from the picker or enter a hex value.
- Background Color: set the color behind your posts, the same way.
- Orientation: choose Auto, Landscape or Portrait. Leave it on Auto and the app adapts to your screen. Set it manually to force a specific presentation.
- Hide Header: turn this on to remove the top bar from the display.
- Title: enter your own header title, for example “Company News” or the name of a location.
- Upload Logo: add your company logo to the header.
- Date Format: select how dates appear on screen.
- Time Format: choose the 12-hour or 24-hour clock, or select None to leave the time off the display.
- Hide Footer: turn this on to remove the bottom bar, including the engagement counts.
- Hide Post Media: turn this on to show text only and skip the images and videos attached to posts.
- Media Fit: control how images and videos fill their area. Crop fills the space completely and trims the edges of the media, while Fit keeps the whole image visible and may leave space around it.
💡Tip: when you build a Custom theme, keep a strong contrast between Text Color and Background Color. People read screens from several meters away, and low-contrast brand colors that look fine on a website often turn unreadable on a wall.
Advanced Settings
- Tags: add tags to organize the app and to use it in a Tag-Based Playlist. Click Manage Tags to edit your account’s tags.
- Default Duration: set how long the app plays when you add it to a playlist. The default is 20 seconds.
- Availability: turn this on to schedule when the app is active, then set a From and To date and time. Click Add Scheduled Availability for additional periods, or tick Non-expiring to keep the app available indefinitely.
✅Click Save. Your new app appears in the My apps tab, ready to assign to a screen or add to a playlist.
Speakap app example
Here is how a Speakap news post looks once the app plays on a screen.
Troubleshooting
Most issues trace back to one of two places: your settings in the platform, or the access you granted in Speakap. Work through the checks below first, since they cover both.
- No posts appear on screen: check that at least one Post Type is still selected, that the matching content exists in Speakap, and that Post Expiration is not filtering out everything you publish. Then confirm the app is assigned to the screen and that you have pushed your changes.
- Posts stopped updating: check that the screen is online, then check that the custom application still exists in your Speakap network, since deleting it stops playback at the next refresh. If it is gone, add it again and reconnect the app with the new ID and Secret.
- Some posts are missing: the app shows only the content the platform has access to. Check your Source selection in the app, then check the access you granted in Speakap, since choosing Select groups there hides everything outside those groups. Also raise Number of Posts if you publish more often than the app pulls in.
- Connecting to Speakap fails: check that your domain follows the
yourname.speakap.comform, and that you pasted the ID and Secret in full with no trailing spaces. If it still fails, generate a fresh pair in Speakap. - Older posts keep appearing: set Post Expiration to Last 24 hours, Last 7 days or Last 30 days so the app drops content once it goes stale.
- Long posts get cut off: set Post Overflow Behaviour to Scroll, then raise Post Duration so the text has time to finish scrolling.
- Images look cropped, or leave gaps around the edges: switch Media Fit between Crop and Fit, or use the Editorial layout to give media a smaller role.
- Text is hard to read on the screen: switch Theme between Light and Dark to suit the lighting in the room.
F.A.Q.s
Got questions? We’ve got answers! This section addresses common questions about the Speakap app.
You need access to Speakap’s Network Settings to add the platform as a custom application and generate the ID and Secret. If you cannot reach that area, ask your Speakap administrator to complete those steps and pass you the credentials. You can then handle everything on the platform side yourself.
No. Only the connection you set up needs Speakap access. Everyone else simply watches the screen.
No. Your ID and Secret stay valid, so you never need to refresh them. Watch the custom application itself instead: if someone deletes it from your Speakap network, your screens stop receiving new posts at the next refresh and you need to add it again.
Yes. Generate the credentials once, then reuse them across every Speakap app in your account. Each app keeps its own post, style and duration settings.
Yes. Create as many Speakap apps as you need and configure each one differently, then assign each to the screens where it fits. A common setup pairs a News-only app for reception screens with an Updates and Events app for break rooms, each pointing at a different Source.
That depends on your Refresh Rate. With the default of 30 minutes, a new post appears within half an hour. Lower the refresh rate if your announcements are time-sensitive.
The footer shows engagement counts for each post. Turn on Hide Footer to remove them.
Yes. Add it to layout the same way you would any other app. Give it a generous area, since posts carry both text and media.
Only the platforms’s built-in text is translated. This includes labels, headings and any text generated directly by the platform app.
Content coming from external platforms or APIs is not translated by the platform. This includes data retrieved from external services, posts or media from the connected platform, text or metadata supplied by the API source, and system messages generated by external platforms.
The screen keeps showing the last set of posts it fetched, so your audience still sees your latest communications. The app cannot pick up new posts while the screen is offline, and it resumes refreshing on its own once the connection returns.