Overview
Power BI is Microsoft’s business analytics service for building interactive reports and dashboards. The new Power BI app brings that content to your screens: sign in with your Microsoft account or a service principal, select the dashboard or report you want to show, and the Platform displays it on your screens.
ℹ️ New vs existing (legacy) Power BI app: The new Power BI app is easier to set up and supports more filters and controls. Starting October 29, 2026, new users primarily have the new (selector-based) Power BI app available by default. Users of the existing (URL-based) Power BI app can keep using it or switch to the new one. You can find the documentation for the existing (URL-based) Power BI app here.
Creating a Power BI app
Step 1 – Locating & Selecting the App
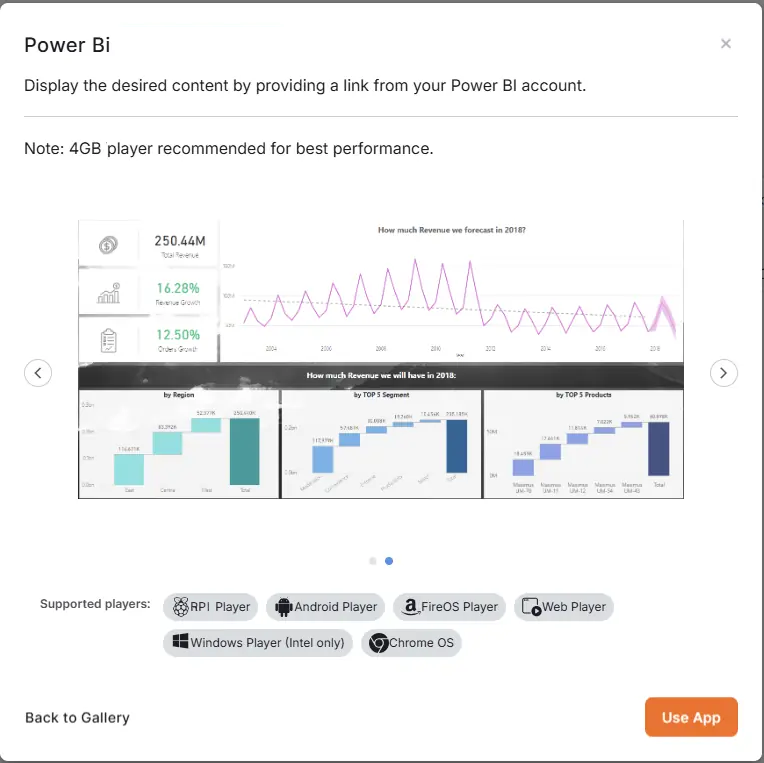
In the Portal, open the Apps section, locate the Power BI app within your app gallery, and click Use App to create a new one.
Step 2 – Selecting One of the Two Main Options
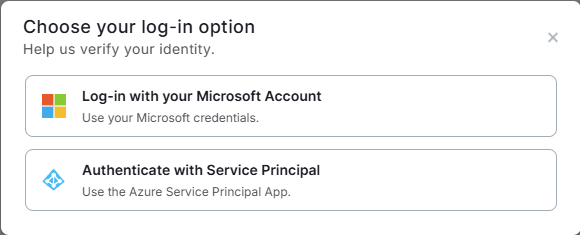
After clicking the Use App button, the Choose your log-in option pop-up window presents you with two options for this app.
- The ‘Log-in with your Microsoft Account’ option signs you in with your own Microsoft credentials. It is the quickest way to get started and is preferable when you manage the Power BI content yourself. The Platform lists the dashboards and reports your Microsoft account can access.
- The ‘Authenticate with Service Principal’ option signs you in with a Microsoft Entra app registration instead of a personal account. It is preferable for organizations with strict security policies and when your screens should not depend on an individual employee’s credentials or password changes. This option requires a one-time setup in the Azure portal and in the Power BI Admin portal. Follow the Power BI with Service Principal (New) guide first.
Step 3 – Filling in the App Details
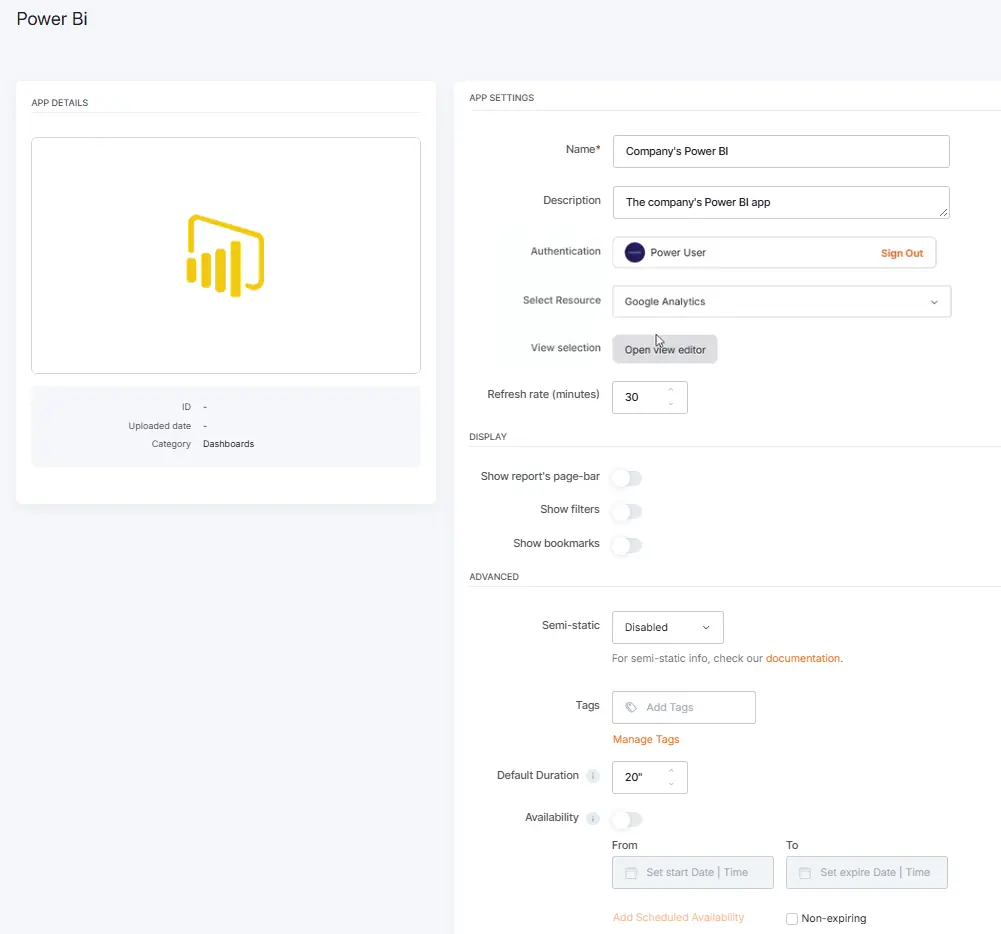
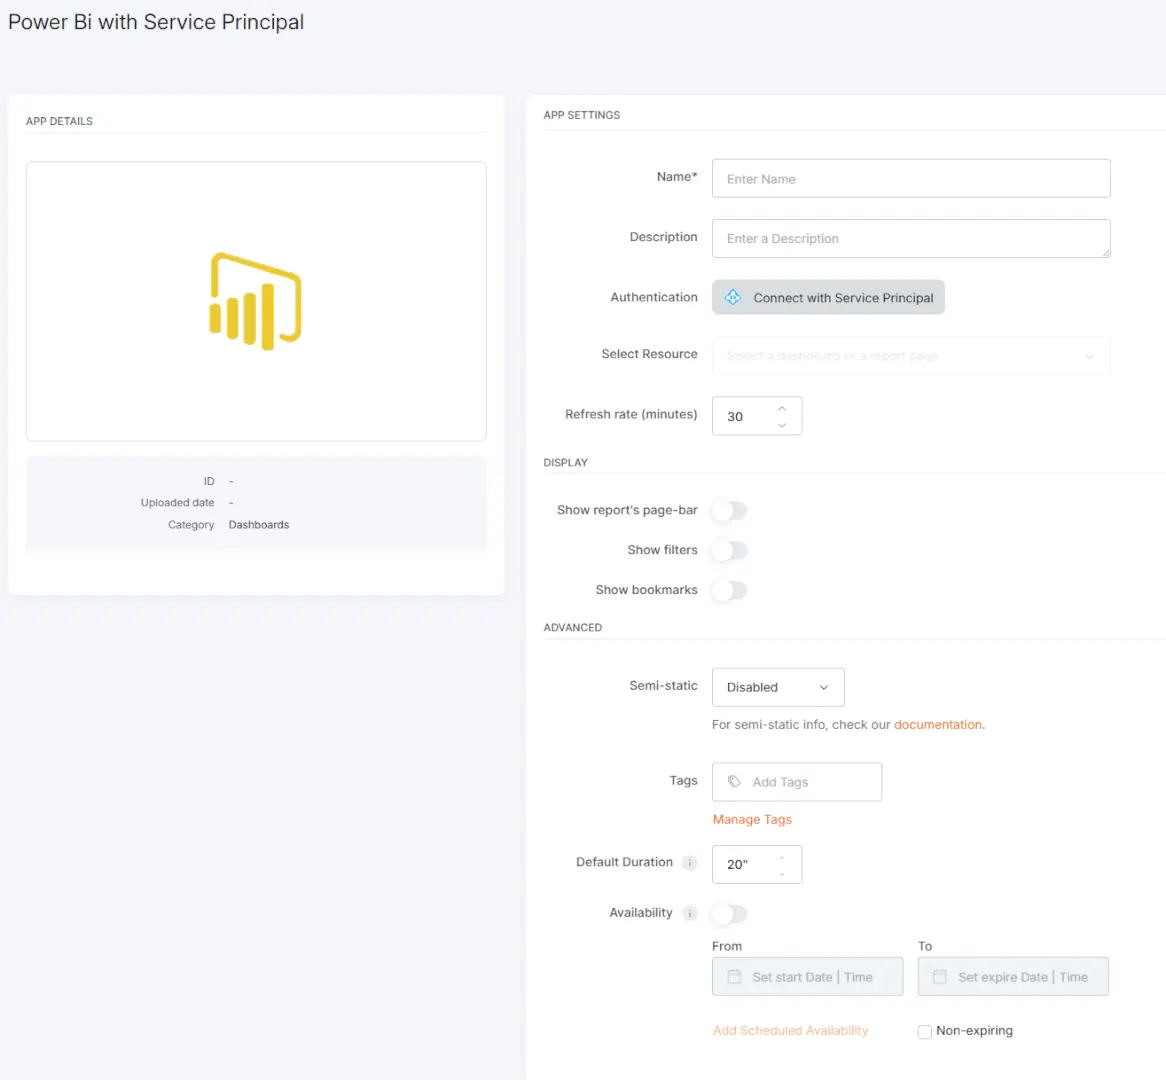
Depending on your previous choice (either the Log-in with your Microsoft Account [1] or the Authenticate with Service Principal [2] option), fill in the app details as follows by clicking one of the following tabs:
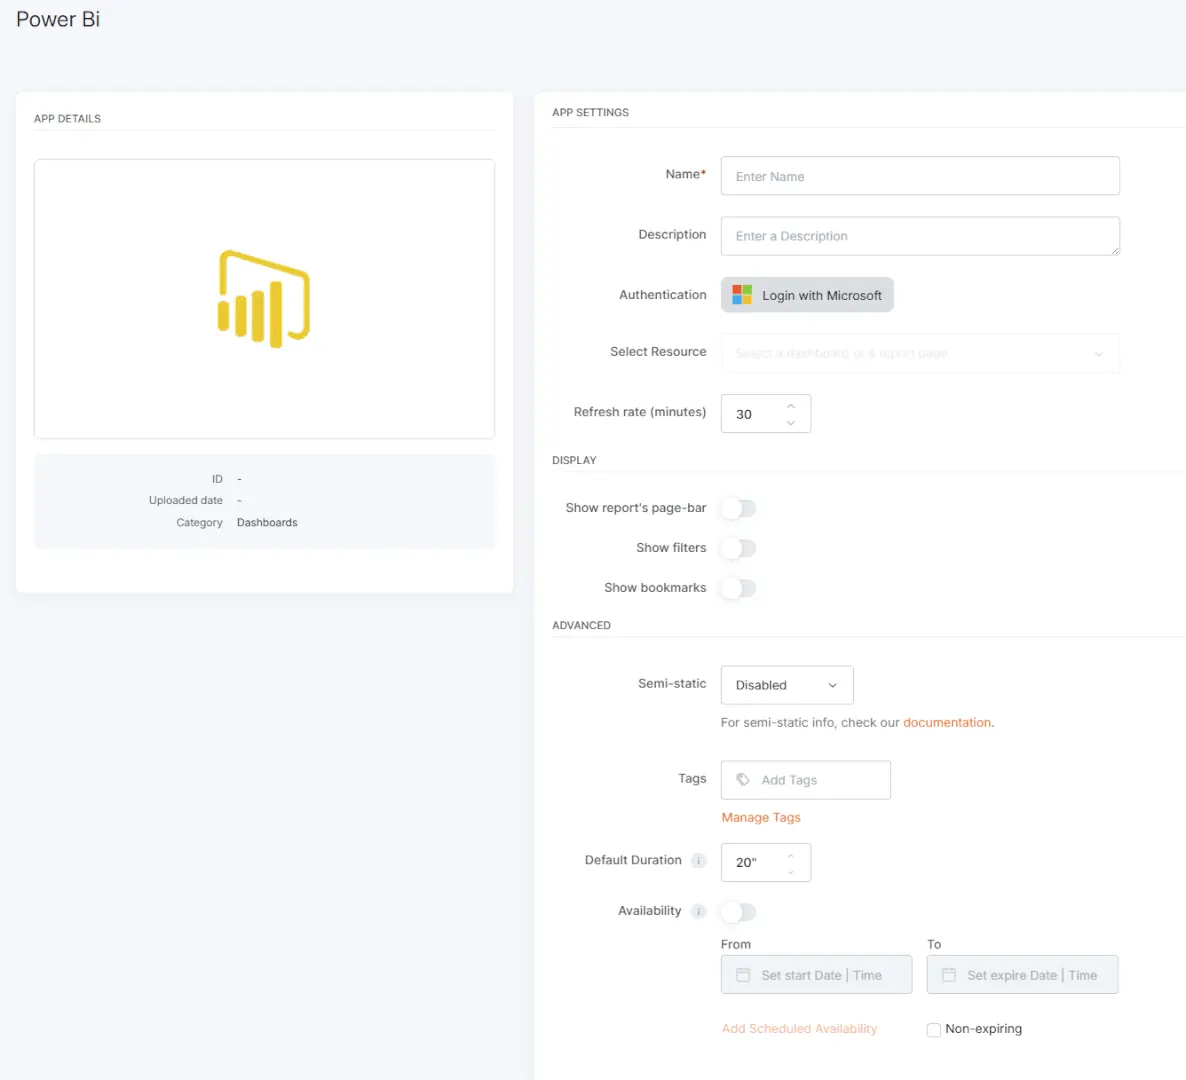
- A Name is required for the app and an optional Description.
- Click the Login with Microsoft button and sign in with your Microsoft credentials.
- Once you authenticate, the Select Resource drop-down becomes active.
- Click Select Resource, and choose the dashboard or the report you want to display. The list shows only the dashboards and reports your Microsoft account can access in Power BI.
- If you selected a report, click Open view editor to choose the page, bookmarks, and filters you want to show on screen, and click Save Selection. More details can be found in the Selecting the Power BI View section below.
- Then, choose the Refresh rate (minutes) for your content (the default rate is 30 minutes).
- Under Display, enable Show report’s page-bar, Show filters, or Show bookmarks to display the respective Power BI elements on your screen. All three options are off by default and apply to reports.
- Under Advanced, you can enable Semi-static for Raspberry Pi players. More details can be found in the Advanced Settings section below.
- You can also add a Tag for this app to better manage it in the future.
- Choose the Default Duration in seconds.
- You can set the Availability of the app.
- Click “Save”, and your app is ready to use. Assign it to your screen, and the screen displays the selected dashboard or report.
- A Name is required for the app and an optional Description.
- After you choose Authenticate with Service Principal in Step 2, the Authenticate via service principal pop-up window opens. Provide the Tenant ID, Client ID, and Client Secret of your Microsoft Entra app and click Authenticate.** All three fields are required. You can reopen this window at any time by clicking the Connect with Service Principal button. Once you authenticate, the Select Resource drop-down becomes active.
- Click Select Resource, and choose the dashboard or the report you want to display. The list shows only the dashboards and reports your service principal has access to. With a service principal, only Workspaces are available. My Workspace and Power BI Apps are not supported.
- If you selected a report, click Open view editor to choose the page, bookmarks, and filters you want to show on screen, and click Save Selection. More details can be found in the Selecting the Power BI View section below.
- Then, choose the Refresh rate (minutes) for your content (the default rate is 30 minutes).
- Under Display, enable Show report’s page-bar, Show filters, or Show bookmarks to display the respective Power BI elements on your screen. All three options are off by default and apply to reports.
- Under Advanced, you can enable Semi-static for Raspberry Pi players. More details can be found in the Advanced Settings section below.
- You can also add a Tag for this app to better manage it in the future.
- Choose the Default Duration in seconds.
- You can set the Availability of the app.
- Click “Save”, and your app is ready to use. Assign it to your screen, and the screen displays the selected dashboard or report.

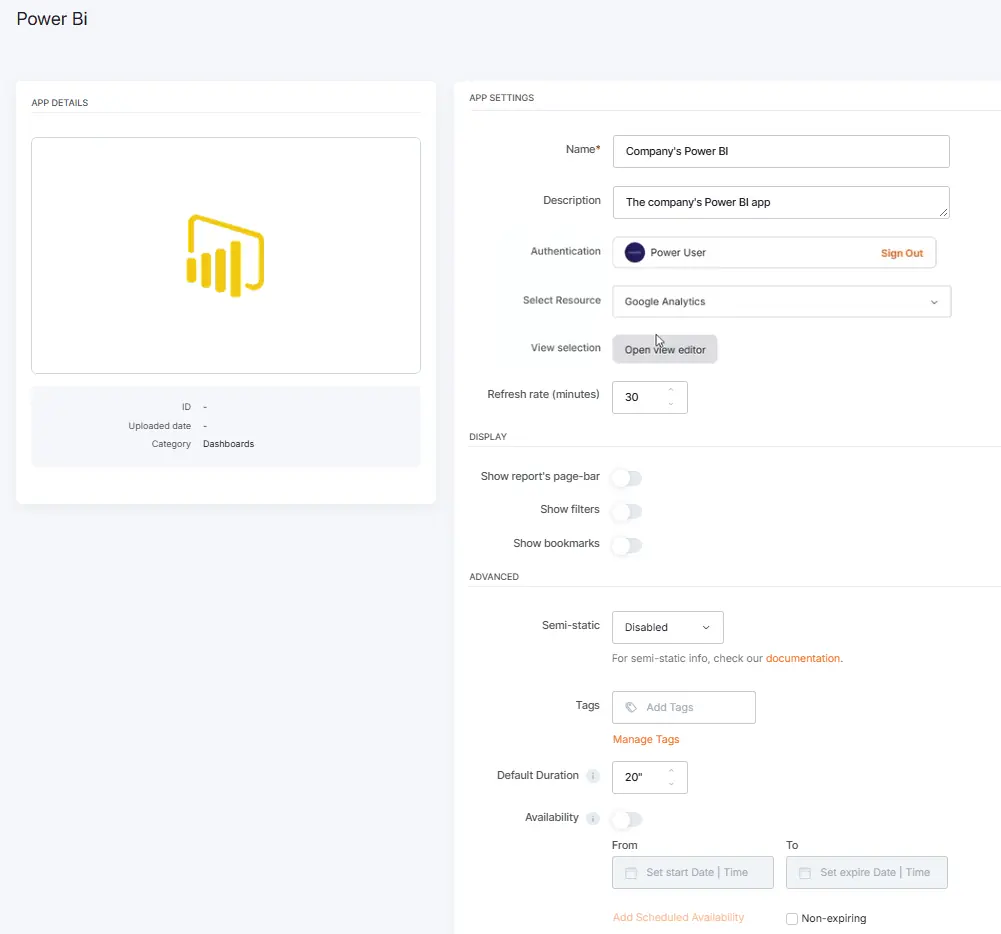
ℹ️ Refresh sources and data: use the Refresh sources and Refresh data buttons to refresh individual workspaces, reports or apps after an update. If the Platform cannot refresh the data, a tooltip shows the date of the last update.
ℹ️ Disabled workspaces, reports or apps: hover over a disabled item to see why the app cannot use it. You may need to try again later or fix the item in Power BI first.
Selecting the Power BI View
⚠️ Applicable only to reports. Dashboards display on screen as they are in Power BI.
Power BI reports can have several pages, bookmarks, and filters. The view editor lets you decide exactly which view of the report appears on your screen:
- After you select a report in Select Resource, click the Open view editor button. Once you have saved a view, the button reads Edit selection instead.
- The Select the Power Bi view you want to show window opens with a live, interactive preview of your report.
- Navigate to the page you want to display, apply any bookmarks, and set your filters exactly as you want them to appear on screen.
- Click Save Selection. The Platform saves the report in the state you leave it, and your screen displays that view. To clear your selection and return to the report’s default view, click Restore defaults.
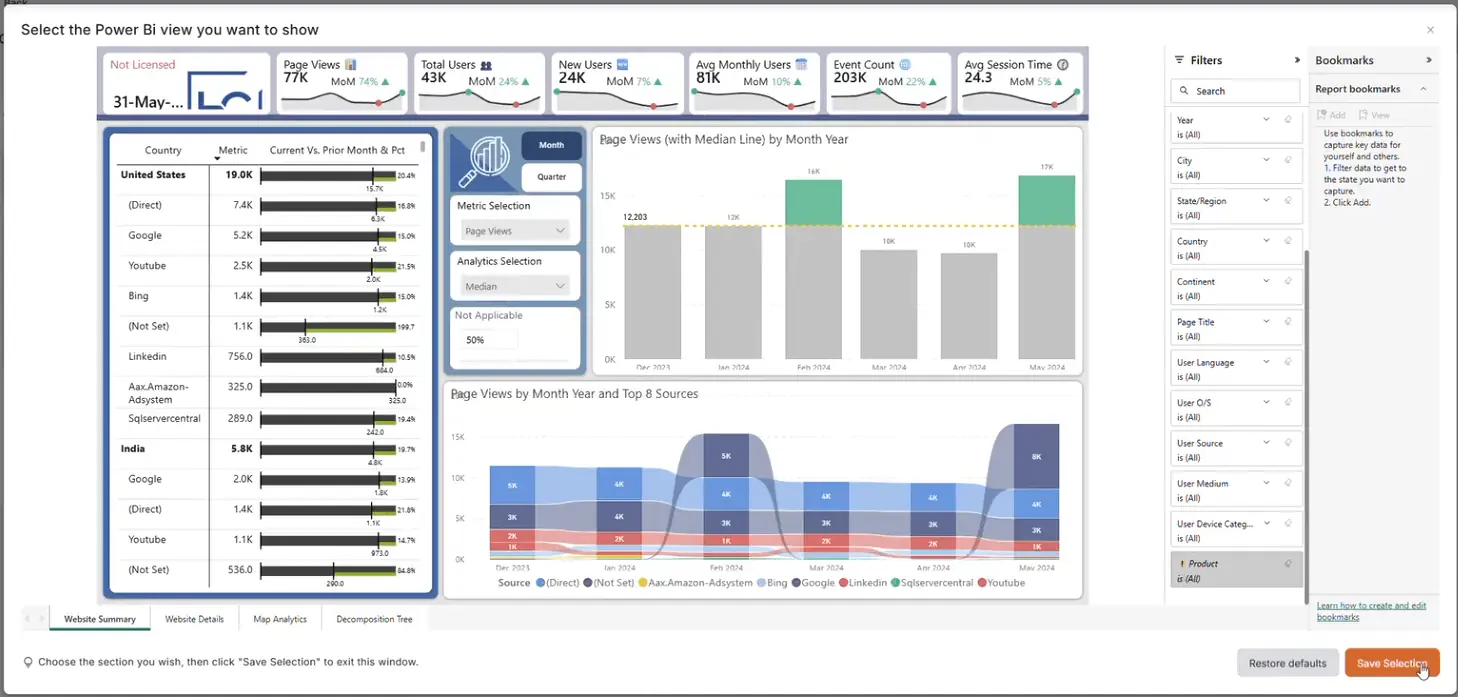
💡 If you do not save a selection, the Platform displays the report’s default view. The Display options (Show report’s page-bar, Show filters, and Show bookmarks) only control which Power BI panes are visible on screen. They do not change the saved view.
Service Principal Authentication Settings
ℹ️ What is a Service Principal? A service principal is the identity of an application registered in Microsoft Entra ID (formerly Azure Active Directory). Instead of signing in with a person’s Microsoft account, the Power BI app authenticates as that application, using its Tenant ID, Client ID and Client Secret. Because the authentication is linked to the application rather than to a user, your screens keep playing when employees change roles or passwords and you re-authorize far less often.
** Type your Microsoft Entra app’s Tenant ID, Client ID, and Client Secret to authenticate the Power BI app with your Power BI tenant.
Before you use this option, you need to register a Microsoft Entra app, enable the Power BI admin settings, and add the service principal to your Power BI workspace. Find a step-by-step guide in Power BI with Service Principal (New), which also covers identities for reports with Row-Level Security or user impersonation. Remember that the client secret expires on the date you set in Azure. Create a new secret before that date, then enter it into the app via the Connect with Service Principal button, so your screens keep playing.
Advanced Settings
Semi-static
💡 Applicable only for Raspberry Pi. When you enable this option, the Raspberry Pi takes a screenshot of the Power BI report or dashboard in the background every X minutes, based on the refresh rate. When the app’s playback time comes, the player displays that screenshot. For heavy dashboards, we recommend this option so the data loads and renders fully before it appears on screen.
Power BI’s Final result
This is how your dashboard or report displays on your TV screen.

Updating an Existing Power BI App
Power BI apps you created before this update still use the URL you pasted at the time, and they keep playing on your screens as they are. You can switch them to the new version whenever it suits you:
- Open the Power BI app you want to update. A pop-up window asks you to Keep current or Switch to new version.
- Click Keep current to leave the app as it is, or click Switch to new version to continue.
- If the Platform asks you to sign in to Microsoft again, complete the sign-in. The new version needs an additional permission to read your Power BI workspaces.
- The Platform reads your existing URL and pre-selects the same dashboard or report in Select Resource. Any page, bookmark, or filter included in your URL carries over into the saved view, which you can adjust at any time with Edit selection.
- Click Save to complete the switch, or Cancel to keep the URL version.
💡 If the Platform cannot read your URL, the app stays on the URL version and continues to play as before. In that case, create a new Power BI app and select your content from Select Resource.
F.A.Q.s
Got questions? We’ve got answers! This section addresses common questions about the Power BI app.
Log in to the Portal, edit the Power BI app, click Sign Out and log in again with your Microsoft credentials or your service principal. Save the app and push the changes to your screens.
The Microsoft account or service principal you authenticated with no longer has permission to view the selected dashboard or report. Ask your Power BI administrator to grant access. If your organization requires admin consent for new apps, this message can also appear until an administrator approves the Power BI app. For more details about the admin consent workflow, refer to this Microsoft resource.
This message applies only to Power BI apps that still use the URL version. Open the app and switch to the new version, as described in the Updating an Existing Power BI App section, so that you select your dashboard or report from a list instead of a URL.
Ensure that the player has access to the internet. If the screen appears Offline in the Portal, the player cannot reach Power BI and display your content.
Contact our Support team and include the app’s ID in your message.
No. New Power BI apps use the Select Resource drop-down, which lists the dashboards and reports your account or service principal can access. This removes broken links and copy-and-paste errors. Power BI apps you created before this update keep their URL until you switch them to the new version.
No. Existing apps keep playing with their saved URL. Switch them whenever it suits you, following the steps in the Updating an Existing Power BI App section.
Select Resource lists only the content your Microsoft account or service principal can access in Power BI. Ask your Power BI administrator to share the workspace, dashboard or report with you. Then, edit the app, click Sign Out, authenticate again and open Select Resource. If you use a service principal, remember that only Workspaces are available. My Workspace and Power BI Apps are not supported.
The report has no dataset (semantic model) attached, so the Platform cannot embed it. A warning icon next to the report explains why: No dataset ID found. Check the report in the Power BI service, make sure its dataset exists and that your Microsoft account or service principal has access to it, then reopen Select Resource.
Yes. Open the view editor, apply the bookmark you want, whether a report bookmark or a personal one, and click Save Selection. It does not matter how you reach the view. The Platform saves the view itself, exactly as you leave it, so your screen displays the bookmarked state. The Show bookmarks option under Display only controls whether the Bookmarks pane is visible on screen.
Open the view editor, navigate to the page you want and click Save Selection. Your screen displays that page. If you also want the page tabs visible on screen, enable Show report’s page-bar under Display.