Overview
A service principal lets the new Power BI app connect to Power BI through a Microsoft Entra app registration instead of a personal Microsoft account. Because the authentication belongs to the app and not to a user, your screens keep playing when employees change roles or passwords, and you re-authorize far less often. This guide walks you through the one-time setup in Azure and Power BI, the app setup in the Portal, and the identity information that some reports need.
For every setting of the app, including the Microsoft Account option, see the Power BI – New article.
ℹ️ Power BI capacity required: To use this app without limitations, your Power BI workspace needs a Power BI Embedded, Premium or Microsoft Fabric capacity. Learn more.
Step 1 – Create a Microsoft Entra app in the Azure portal
- Sign in to the Azure portal.
- Search for and select App registrations.
- Select New registration.


- Enter a Name for your application and leave the other options as they are. You can change them at any time.
- Select Register.
- On the app’s Overview page, copy the Application (client) ID and the Directory (tenant) ID and keep them for later. In the Portal, they go into the Client ID and Tenant ID fields.


- Select Certificates & secrets.
- Select New client secret.
- In the Add a client secret window, enter a description, choose when the secret expires, and select Add.


- Copy the secret’s Value (not the Secret ID) and keep it for later. It goes into the Client Secret field in the Portal.

ℹ️ Copy the secret value now: After you leave this page, Azure hides the secret value and you cannot view or copy it again.
💡 Note the expiry date: the client secret expires on the date you chose. Create a new secret before that date and enter it in the Power BI app in the Portal, so your screens keep playing.
Step 2 – Enable the Power BI service admin settings
ℹ️ Power BI admin rights required: only a Fabric (Power BI) administrator can change these settings in the Admin portal.
For a Microsoft Entra app to access Power BI content and APIs, a Power BI admin needs to enable two settings. In the Power BI Admin portal, go to Tenant settings and scroll down to Developer settings:
- Enable Embed content in apps for the entire organization or for a security group that includes your service principal.
- Enable Service principals can call Fabric public APIs for the same scope. In some tenants, this setting still appears as Service principals can use Fabric APIs, or Allow service principals to use Power BI APIs.


ℹ️ Note: service principals have access to every tenant setting they are enabled for. This example enables the settings for the entire organization. To limit access, enable them only for specific security groups, or create a dedicated security group for service principals and exclude it from the settings you want to protect.
Step 3 – Add the service principal to your workspace
ℹ️ Workspaces only: With a service principal, only Workspaces are available in the Power BI app. My Workspace and Power BI Apps are not supported. Add the service principal to every workspace whose content you want to show.
- In the Power BI service, open the workspace you want to give access to, and select Manage access.
- In the Access pane, select Add people or groups.
- Add one of the following:
- Your service principal (used in this example). Its name is the Display name of your Microsoft Entra app, as shown on the app’s Overview page.
- A security group that includes your service principal.


- Select Member in the drop-down menu and then select Add.
- The Access pane now lists the service principal as a Member.


Step 4 – Set up the Power BI app with Service Principal in the Portal
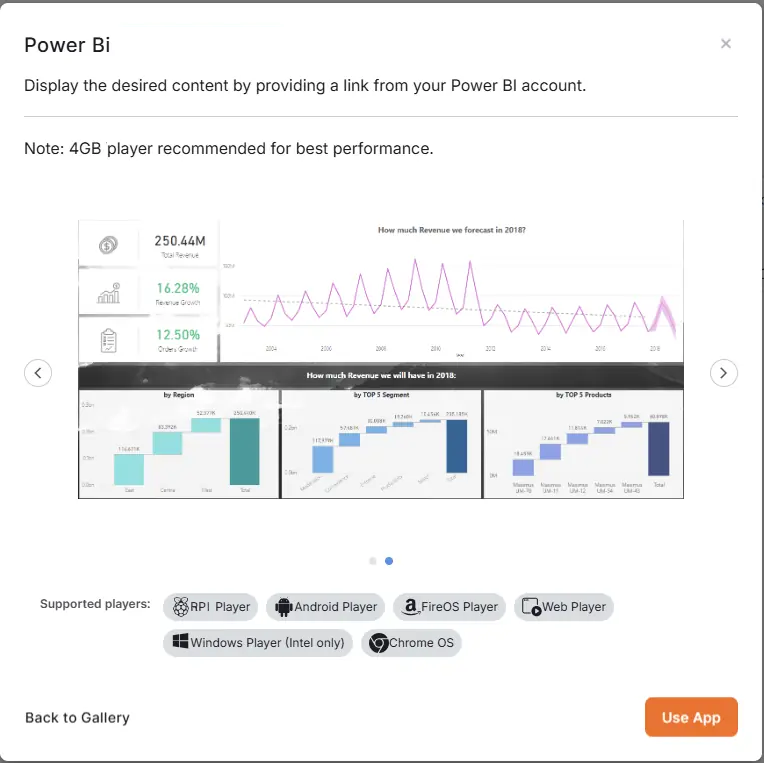
- In the Portal, open the Apps section, locate the Power BI app in your app gallery, and click Use App.
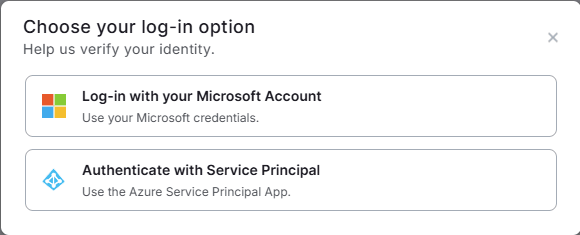
- In the Choose your log-in option window, select Authenticate with Service Principal.
- In the Authenticate via service principal window, enter the Tenant ID, Client ID, and Client Secret from Step 1 and click Authenticate. All three fields are required.
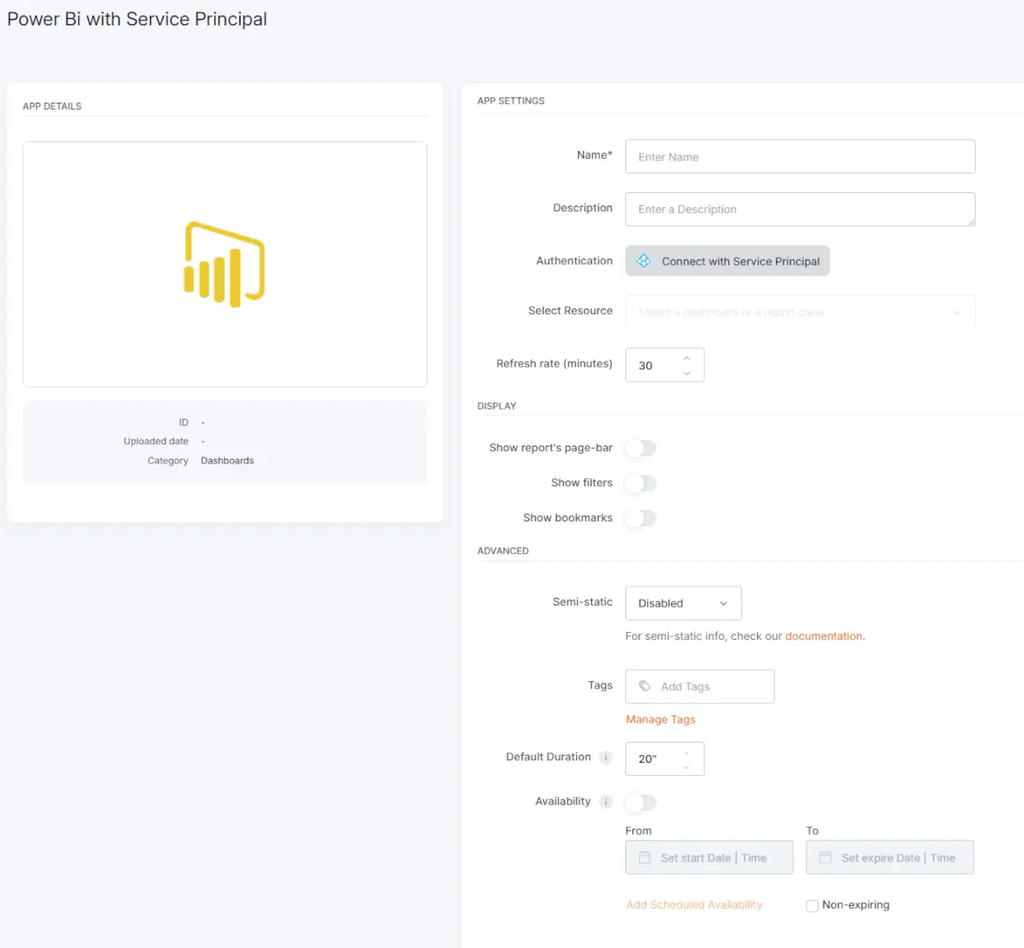

- Enter a Name for the app and an optional Description.
- Click Select Resource, and choose the dashboard or the report you want to display. The list shows only the content of the workspaces you added the service principal to.
- If you selected a report, click Open view editor, choose the page, bookmarks, and filters you want to show, and click Save Selection.
- If your report uses Row-Level Security or user impersonation, add an identity with Set Identities, as described in the Identity Requirements section below.
- Adjust the remaining settings if needed (refresh rate, display options, Semi-static, tags, duration and availability) and click Save. For details on each setting, see the Power BI – New article.
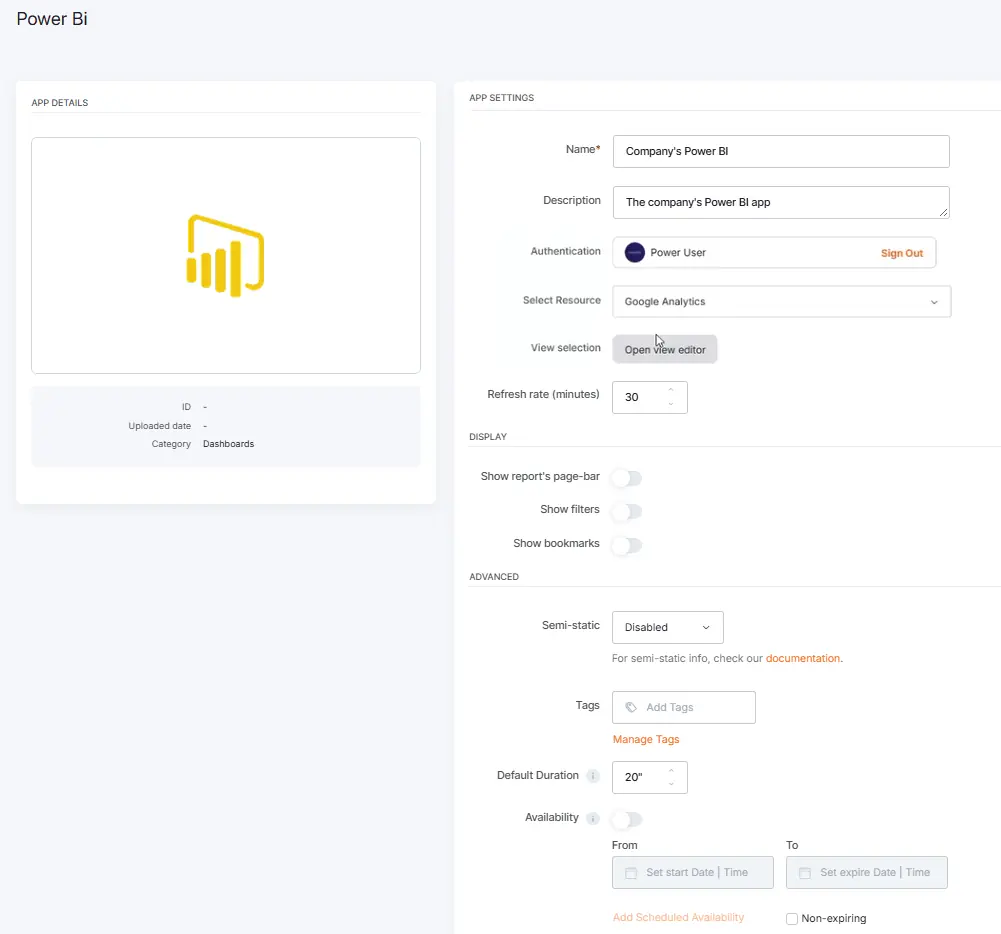
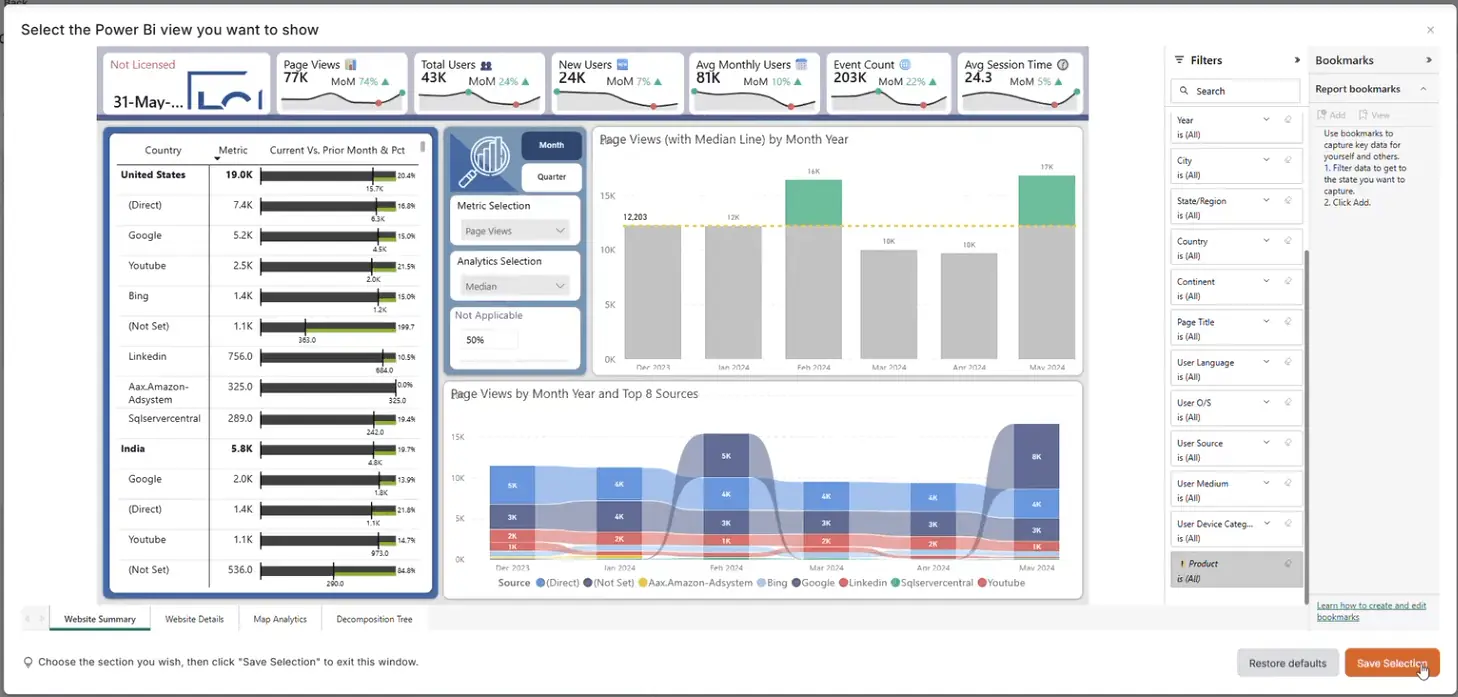
Your Power BI app with Service Principal authentication is now ready to use.
Identity Requirements
When you use the Power BI app with Service Principal authentication, you may need to provide identity information, depending on the Power BI settings of your report or semantic model (dataset). Identity information applies only to the Authenticate with Service Principal option. With the Log-in with your Microsoft Account option, Power BI uses the identity of the account you sign in with, so you do not fill in any identity fields.
What Are Identities and Why Are They Needed?
Power BI supports Row-Level Security (RLS) and user impersonation to restrict or personalize data. When you use a service principal to access and display content, Power BI sometimes requires you to specify which “user” you’re acting on behalf of, especially when:
- A semantic model (dataset) uses RLS
- The report uses live data connections that impersonate users (e.g., DirectQuery, SSAS)
- The application serves multiple end-users with different data access levels
The Platform does this by passing what Power BI calls an EffectiveIdentity, which includes a username, roles (if any) and, optionally, semantic model (dataset) IDs.
Setting Identities in the App
When you authenticate with a service principal and select a report in Select Resource, the Set Identities field appears with an Add button. Use it only when your report needs an identity, as described in When Are Identities Required? below:
- Click Add next to Set Identities.
- In the window that opens, fill in the Username and, if needed, the Roles and Datasets, as described in What to Provide below.
- To add another identity, click + Add New Identity.
- Click Save and then save the app.
Workspaces, reports, or apps that the app cannot use appear disabled in Select Resource. Hover over them to see why. For example, a report without a semantic model (dataset) shows the message No dataset ID found.
When Are Identities Required?
| Scenario | Are identities required? | Required fields |
|---|---|---|
| Semantic model (dataset) with Row-Level Security (RLS) | Yes | username, roles, datasets |
| Report using DirectQuery or Live Connection with impersonation | Yes | username, roles (if RLS), datasets |
| Report connected to SQL Server Analysis Services (SSAS) | Yes | username, roles (if RLS), datasets |
| Report for multi-tenant use (serving multiple users) | Yes | username, roles (if RLS), datasets |
| Semantic model is import-only, with no RLS or impersonation | No | – |
| Service principal has full access and no RLS is defined | No | – |
What to Provide
When your report needs an identity, fill in the following fields in the Set Identities window:
- Username (required)
The user you’re impersonating. This is typically an email address (UPN), e.g.user@example.com - Roles
If your semantic model uses RLS, add the exact name of each role defined in Power BI, e.g.Manager. Each role appears as a separate tag. - Datasets
Required only in certain configurations (e.g., when the report uses a semantic model from another workspace). This is the semantic model’s ID (a GUID), added as a tag like the roles. To find it, open the semantic model in the Power BI service and copy the ID that follows/datasets/in your browser’s address bar.
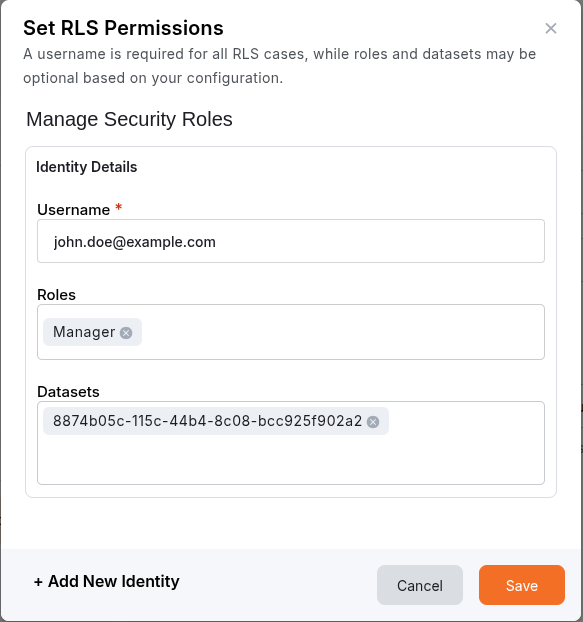
Example
Let’s say your semantic model has RLS and you want to show the report as user John Doe, who belongs to the “Manager” role.
Fill in the identity like this:
- Username:
john.doe@example.com - Roles:
Manager - Datasets:
8874b05c-115c-44b4-8c08-bcc925f902a2
💡 If your semantic model doesn’t use roles, you can leave the “Roles” field empty.
How to Check If RLS Is Used
To verify whether a semantic model in Power BI uses Row-Level Security:
- Go to the Power BI service
- Open the workspace and locate the relevant semantic model
- Select More options (…) next to it and then select Security
- If roles appear in the list, the semantic model uses RLS
You can ask the report owner or your Power BI administrator if you’re unsure.
Common Signs You Need Identities
- The view editor shows an error or no data for your report
- You know the report is using RLS or pulling live data
- You expect the content to show different data for different users
- You see access-related errors in the view editor or on your screen
Further Reading (Microsoft Docs)
For more technical details and reference, you can review the following official Microsoft documentation:
- Generate embed token using EffectiveIdentity
- Display a report with Row-Level Security (RLS)
- Display a report on an on-premises SQL Server Analysis Services (SSAS)
- Display a report with an Azure Analysis Services (AAS) database
- Display a report with token-based identity (SSO)
F.A.Q.s
Got questions? We’ve got answers! This section addresses common questions about the Power BI app.
This error comes from Microsoft Power BI, not from the Platform. It means your workspace has reached Microsoft’s free embed token limit, which applies when the Platform displays Power BI content with Service Principal authentication. It can happen over time as usage grows (more screens, apps or refreshes). Power BI Pro licenses do not remove this limit.
To remove the limit, Microsoft requires the workspace to run on a Power BI Embedded, Premium or Microsoft Fabric capacity. This is a Power BI licensing requirement and the Platform cannot change it.
The dashboard contains a report whose semantic model (dataset) the service principal cannot access. Grant the service principal access to that semantic model in the Power BI service and the tile appears.
Dashboards and reports in Workspaces where the service principal is a Member or Admin. My Workspace and Power BI Apps are not supported.
The service principal is probably not a member of that workspace. Add it as described in Step 3, then reopen Select Resource. If the workspace still does not appear, use the Refresh sources button in the list.
The report has no semantic model (dataset) attached, so the Platform cannot embed it. Hover over the report to see the message No dataset ID found.
In Azure, create a new client secret as described in Step 1 and copy its value. Then edit the Power BI app in the Portal, reconnect the service principal through the Authentication field with the new client secret and save the app.
No. The new Power BI app lists your dashboards and reports in Select Resource. URLs apply only to apps created with the legacy Power BI app. For details, see the Power BI – New article.